
How to Get Access to a Client's Amazon Seller Central Account: The Solution Provider Portal Guide (With Screenshots)
Amazon has changed how agencies get access to a client's Seller Central account. Access now runs through the Solution Provider Portal: you send an authorization link, the seller approves permissions, and you confirm the SPN request. Here's the exact 6-step SOP our team uses, with a screenshot of every click - plus what sellers are actually approving.
Amazon has changed how agencies and freelancers get access to a client's Seller Central account. Access now runs through Amazon's Solution Provider Portal (SPP): the agency sends the seller an authorization link, the seller chooses exactly which permissions to grant, and the agency confirms the request inside SPP. Once you've done it, it's a clean process. The first time, a couple of screens are easy to get wrong - and one of them can't be undone. This is the exact SOP our team uses to onboard new clients, with a screenshot of every step.
The short version
Log in to the Solution Provider Portal, check your service is published, and copy the authorization link from that service's Action menu. Send it to your client. Once they grant permissions, Amazon emails you. Open the request from that email, change its status from Yet to Contact to Order Confirmed, and click Save. The authorization lasts one year.
How Amazon Client Access Works Now
The new flow splits the work between three parties. Knowing who does what saves a lot of back-and-forth with a new client who is waiting for you to start.
- The agency starts it: you copy an authorization link for one of your published services in the Solution Provider Portal and send it to the seller.
- The seller approves it: they open the link, choose a permission level for each area of Seller Central, pick the countries and regions, and confirm.
- Amazon connects it: you get an email confirming the authorization, including the seller, the service category, the expiry date, and a Service Provider Network (SPN) Request ID. You then confirm that request in SPP to finish the process.
Before You Start
- An approved Solution Provider Portal account for your agency.
- At least one service listed in SPP - for example Account Management or Advertising Optimization - that you'll provide to this client.
- The client's seller name, the marketplaces you'll manage, and the agreed scope of work, so you can tell them which permissions you need.
- The email of the team member who will actually work in the account.
Step 1: Log In to the Solution Provider Portal
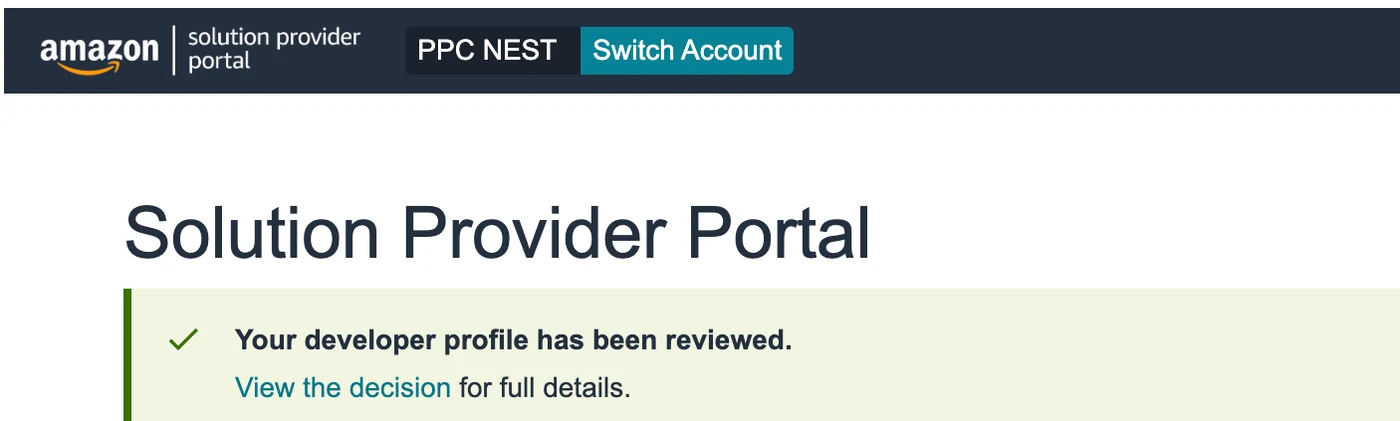
Sign in with your agency's provider account. Before you do anything else, check that your agency name appears in the top bar. If you manage more than one provider account, use Switch Account to make sure you're in the right one - the authorization link you copy belongs to whichever account is active.
Step 2: Make Sure Your Services Are Listed
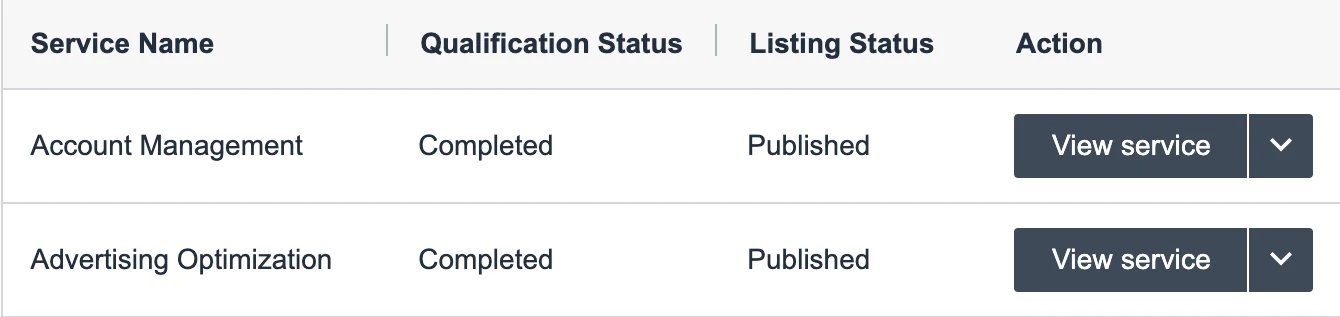
Scroll down the portal home page to your services table. The service you'll provide to this client needs to be there. In our account, both Account Management and Advertising Optimization show a Qualification Status of Completed and a Listing Status of Published.
No service in the table? Use + Add a Service first. The authorization link lives on each service's row, so there's nothing to send until a service is listed.
Step 3: Copy the Authorization Link
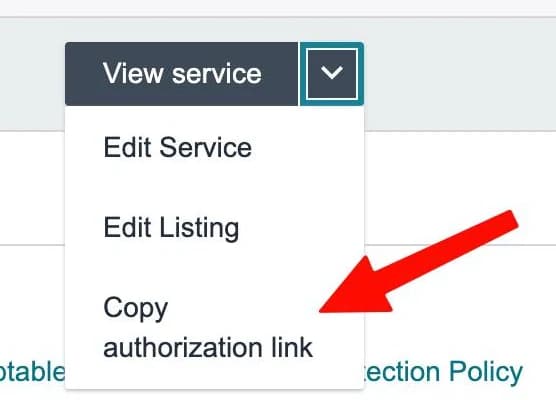
On the row for the right service, click the small arrow next to View service, then choose Copy authorization link. Pick the service that matches the work you'll actually do - the client sees it on their approval screen, for example "to provide Account Management services".
Step 4: Send the Link to Your Client
Send the link to your client. When they open it, they see an Authorize screen with your agency's name. For each permission they choose None, View, Edit, or Admin (where available), select the countries and regions, and confirm.
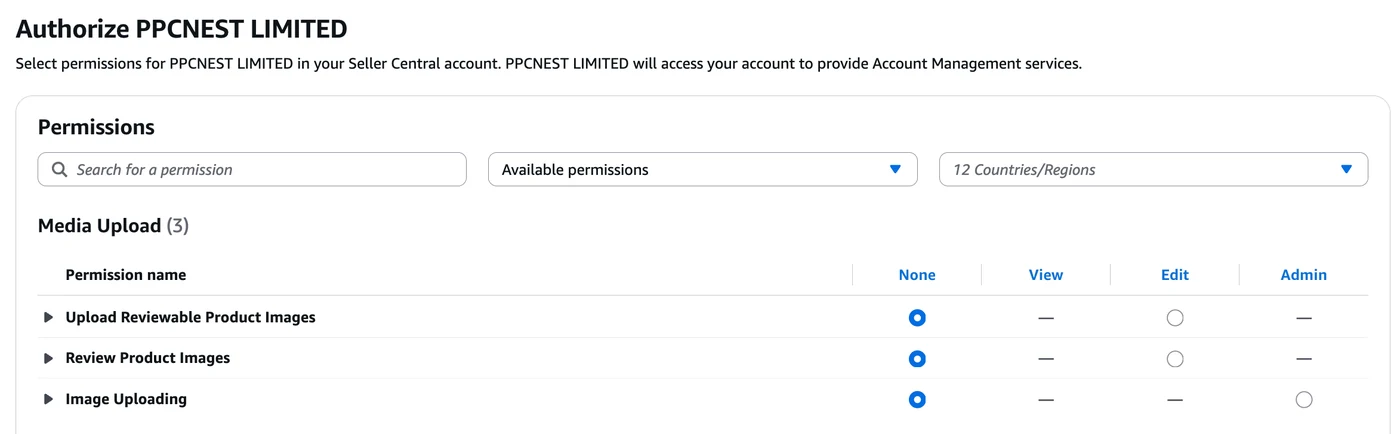
Every permission starts on None
If your client clicks straight through, you'll get an authorization with little or no access. Send them a short list of the permissions your scope needs - and why - along with the link, so nothing gets missed and you don't need a second round.
Step 5: Open Amazon's Authorization Email
Once the client confirms, Amazon emails your agency to say the seller has authorised you to access their Seller Central account. The email lists the seller, the service category, when it was authorised, when it expires, and the SPN Request ID. It also tells you what to do next: confirm the associated SPN request in the Solution Provider Portal. Click the link in the email to open that request.
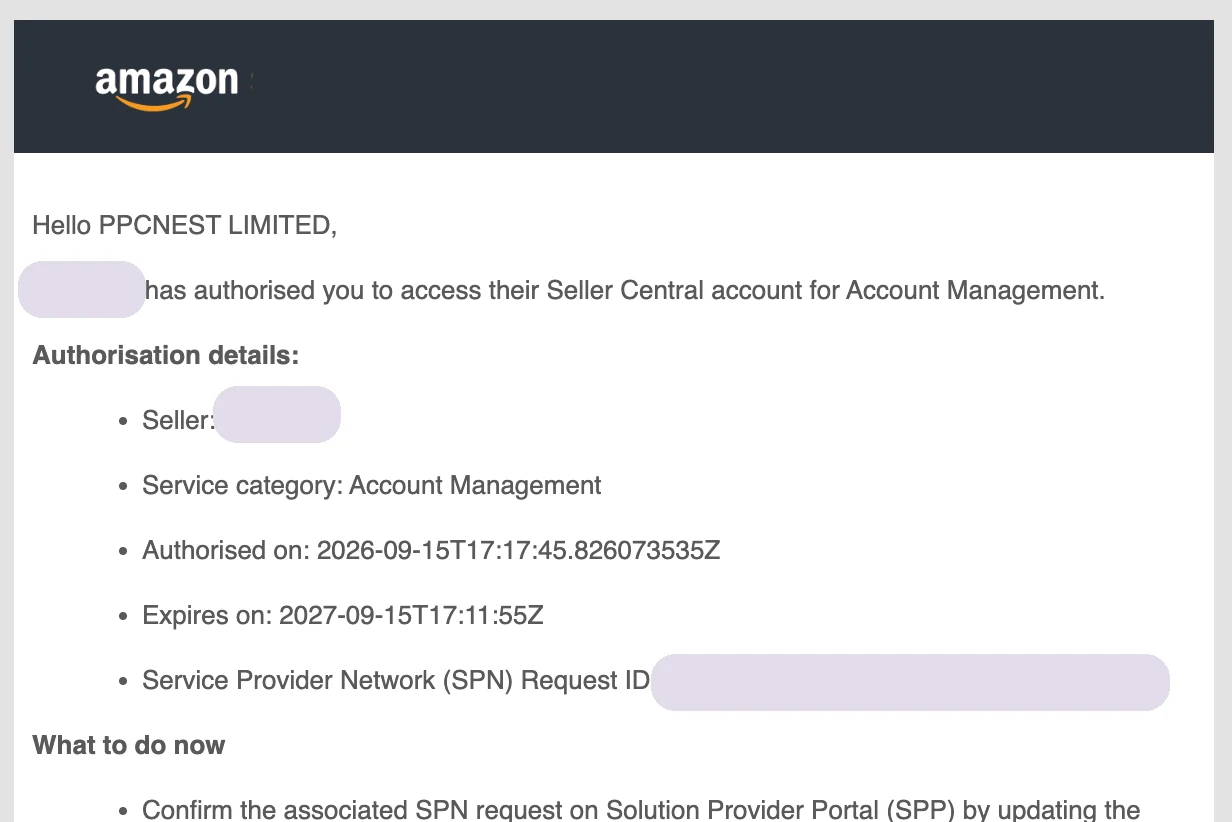
Note the Expires on date. In our case the authorization expires exactly one year after it was granted. Put a renewal reminder in your calendar now, not the week access disappears.
Step 6: Confirm the SPN Request
The link opens the client's request in SPP. Its status shows Yet to Contact. Click the Change Status dropdown.
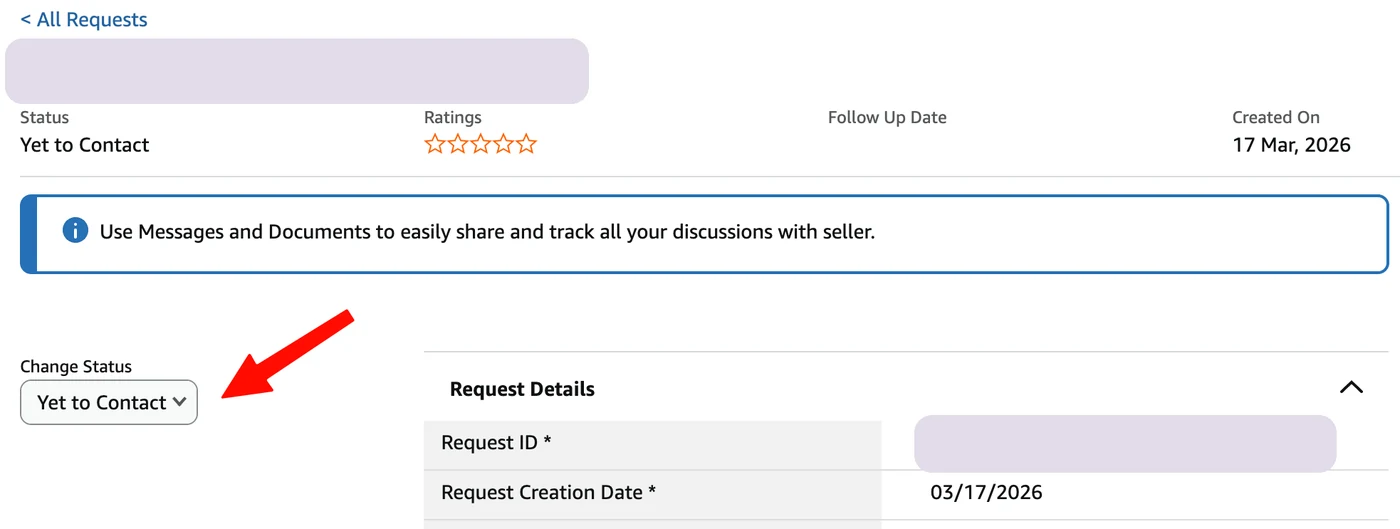
This status change can't be undone
Amazon asks: "Are you sure you want to change your request status? Please note you will not be able to go back to the previous statuses upon update." Click OK - but make sure you pick the right status next.
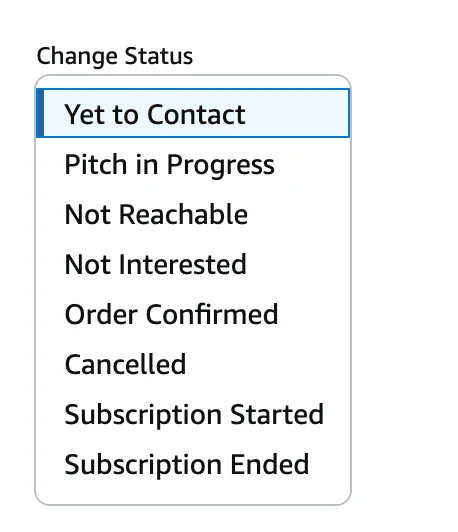
From the status list, select Order Confirmed. Then click the yellow Save button at the top right of the request. That's it - access is shared with you.
How to Check Your Team Actually Has Access
A saved status isn't proof that the person doing the work can get in. Before you tell the client you're ready, run these checks:
- 1Confirm the client shows up: in SPP, go to Services > Permissions Management > Global Account Permissions, then open Clients.
- 2Assign the team member: on the Employee tab, use Edit > Update Client Access, select the seller and save. Then select that seller and set the employee's access rights. If they aren't listed yet, add them as an employee and have them accept the invitation first.
- 3Log in to Seller Central with the email registered in SPP and open the client's account.
- 4Check the seller name, the marketplace, and the sections your scope needs - Campaign Manager, Business Reports, Inventory. Don't make test edits on live campaigns.
For Sellers: What You're Approving When an Agency Sends This Link
If you're a seller and an agency has just sent you an authorization link, here's what you're looking at. The link opens a screen that names the agency and the service they'll provide. Nothing is granted until you choose permissions and confirm.
- You set the level for each permission separately - None, View, Edit, or Admin where it's available. You don't have to hand over everything.
- You choose which countries and regions the access covers.
- The authorization has an expiry date - one year in the authorization we received - so it doesn't run forever by default.
- Ask your agency for a list of the permissions they need and what each one is for. A good agency will have that ready before they send the link.
Troubleshooting: Access Still Missing
- Client doesn't appear under Global Account Permissions: recheck that the client confirmed the authorization link and that you set the request to Order Confirmed and saved it.
- Client appears, but your team member is blocked: review the selected client, the employee's email, and their access rights.
- Permissions are greyed out: check which Seller Central roles Amazon has approved for your agency.
- Still blocked: open an SPP support case with the seller name, request ID, current status, and screenshots. Don't keep changing request statuses to test - you can't go back.
PPC Nest
Hiring an Amazon PPC agency?
Access takes minutes. What happens after it is what matters. Book a free call and we'll review your account and share a 90-day plan built around your margins, not a dashboard ACoS target.
Book a Free CallPPC Nest
Amazon advertising agency specializing in supplements and high-competition categories. Founder-led strategy, not autopilot.
Frequently Asked Questions
The Solution Provider Portal (SPP) is where agencies and service providers manage their Amazon provider account, list the services they offer, and connect with sellers. Getting access to a client's Seller Central account now starts there, with an authorization link for one of your listed services.
Amazon's authorization email includes an Expires on date. The authorization we received expires one year after it was granted, so set a renewal reminder as soon as the email arrives.
SPN stands for Service Provider Network. When a seller authorizes your agency, Amazon's email includes an SPN Request ID for the matching request in SPP. You confirm that request - by changing its status to Order Confirmed and saving - to finish the process.
No. Amazon warns that you can't go back to a previous status once you update it. Select Order Confirmed and save. If something goes wrong, open an SPP support case rather than changing statuses again.
Confirming the request connects the client to your agency, not to a specific person. Assign the client to the employee in SPP, set their access rights, and have them log in to Seller Central with the email registered in SPP.
No. The seller picks a level for each permission - None, View, Edit, or Admin where available - and chooses the countries and regions. Grant what the agreed scope needs.
Ready to Act on This?
See the same analysis applied to your account.
Every article we publish comes from real account work. Book a free call and we'll apply these same ideas directly to your campaigns.